Keeping your laptop’s fans and vents clean is essential for maintaining optimal performance and preventing overheating.
Dust and debris can accumulate over time, obstructing airflow and causing your laptop to run hotter than necessary.
This guide provides a step-by-step approach to effectively clean your laptop’s fans and vents, ensuring better cooling and longevity for your device.
1. Gather Your Cleaning Supplies
Having the right tools on hand will make the cleaning process easier and more effective.
- Compressed Air Canister: This is essential for blowing dust out of hard-to-reach areas without damaging sensitive components. Look for a canister with a straw attachment for precision.
- Microfiber Cloth: Use a soft, lint-free cloth to wipe down surfaces and remove any accumulated dust from the exterior.
- Screwdriver Set: Depending on your laptop model, you may need a small Phillips or Torx screwdriver to access the internal components.
- Isopropyl Alcohol (Optional): For deeper cleaning, especially on sticky surfaces, isopropyl alcohol can be used to clean fans and other components.
2. Power Down and Unplug
Safety is paramount when cleaning electronic devices.
- Shut Down Your Laptop: Ensure your laptop is completely powered off to prevent any electrical issues during cleaning.
- Unplug All Cables: Disconnect the power adapter and any peripherals, such as USB devices or external monitors, to avoid accidental damage.
- Remove the Battery (If Possible): If your laptop has a removable battery, take it out to ensure complete safety during the cleaning process.
3. Locate the Vents and Fans
Understanding where the vents and fans are located will help you focus your cleaning efforts.
- Identify Vents: Most laptops have air intake and exhaust vents located on the sides or bottom. Check your laptop’s manual or manufacturer’s website for specific locations.
- Accessing the Fans: In some models, you may need to remove the bottom panel to access the internal fans. Carefully follow the instructions in your laptop’s service manual.
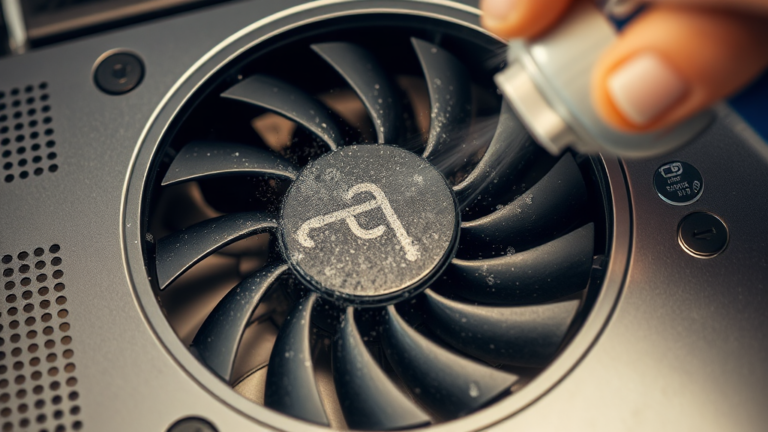
4. Use Compressed Air to Blow Out Dust
Compressed air is effective at removing dust without physical contact, reducing the risk of damage.
- Short Bursts: Hold the canister upright and use short bursts of air to blow dust out of the vents. Avoid tilting the canister to prevent moisture from escaping.
- Target Fans: If you have access to the internal fans, blow air directly into them to dislodge any dust buildup. Be careful not to spin the fans with the air, as this can cause damage.
- Work in a Well-Ventilated Area: Dust may be blown out into the air, so it’s best to clean in a well-ventilated space or outdoors.
5. Wipe Down Surfaces
Cleaning the exterior and surrounding areas helps maintain a tidy workspace and prevents dust from re-entering the laptop.
- Microfiber Cloth: Dampen a microfiber cloth with a small amount of isopropyl alcohol (if needed) and gently wipe down the surfaces of your laptop, including the keyboard, touchpad, and screen edges.
- Avoid Excess Moisture: Ensure the cloth is not overly wet to prevent moisture from seeping into any openings.
6. Reassemble and Power On
Proper reassembly ensures that your laptop is ready for use without issues.
- Replace the Bottom Panel: If you removed the bottom panel, carefully reattach it and tighten the screws securely.
- Reinsert the Battery: If applicable, put the battery back in place.
- Reconnect Power: Plug in your laptop and power it on. Check that the fans are functioning properly and listen for any unusual noises.
7. Regular Maintenance
Regular cleaning can prevent dust buildup and maintain optimal performance.
- Establish a Cleaning Schedule: Aim to clean your laptop’s fans and vents every 3 to 6 months, or more frequently if you work in dusty environments.
- Monitor Performance: Keep an eye on your laptop’s temperature and performance. If you notice it overheating or the fans running loudly, it may be time for another cleaning session.
8. Conclusion
Cleaning your laptop’s fans and vents is a straightforward yet essential task that can significantly improve cooling performance and extend the life of your device.
By following these steps, you can effectively remove dust and debris, ensuring that your laptop runs efficiently and stays cool during use.
Regular maintenance not only enhances performance but also helps prevent overheating issues that can disrupt your work and lead to costly repairs.
With a little effort, you can keep your laptop in top condition, ready to handle all your business travel needs.